
 ENG
ENGIntegration with Appsflyer
This guide provides instructions on setting up a new Offerwall campaign in the Appsflyer dashboard.
Additional guidance can be found in the Appsflyer Set-up Guide for Tapjoy
Tapjoy Campaign Configuration
Step 1: Partner Activation
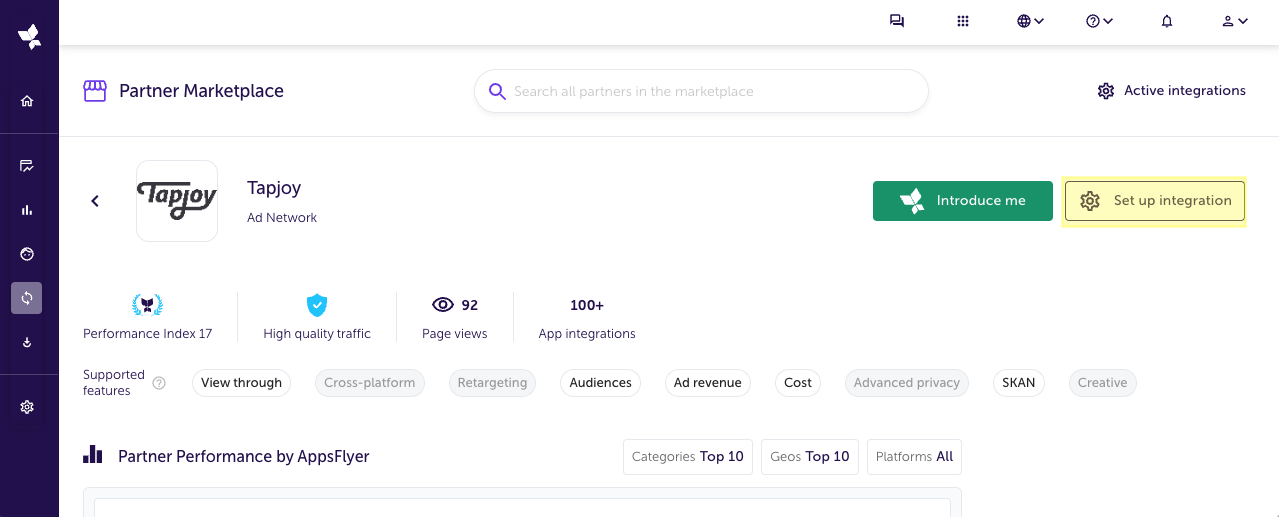
- From the side menu, select Collaborate > Partner Marketplace.
- Search and select for Tapjoy.
- On the Tapjoy profile page, click the Set Up Integration button, upper right hand side.
- You’re directed to the integration setup page. From the Integration tab, turn on Activate Partner.
⚠️ Important ⚠️
Don't use Activate partner to pause or turn off campaign attribution.
Disabling partner integration can cause irreversible damage to active campaigns.
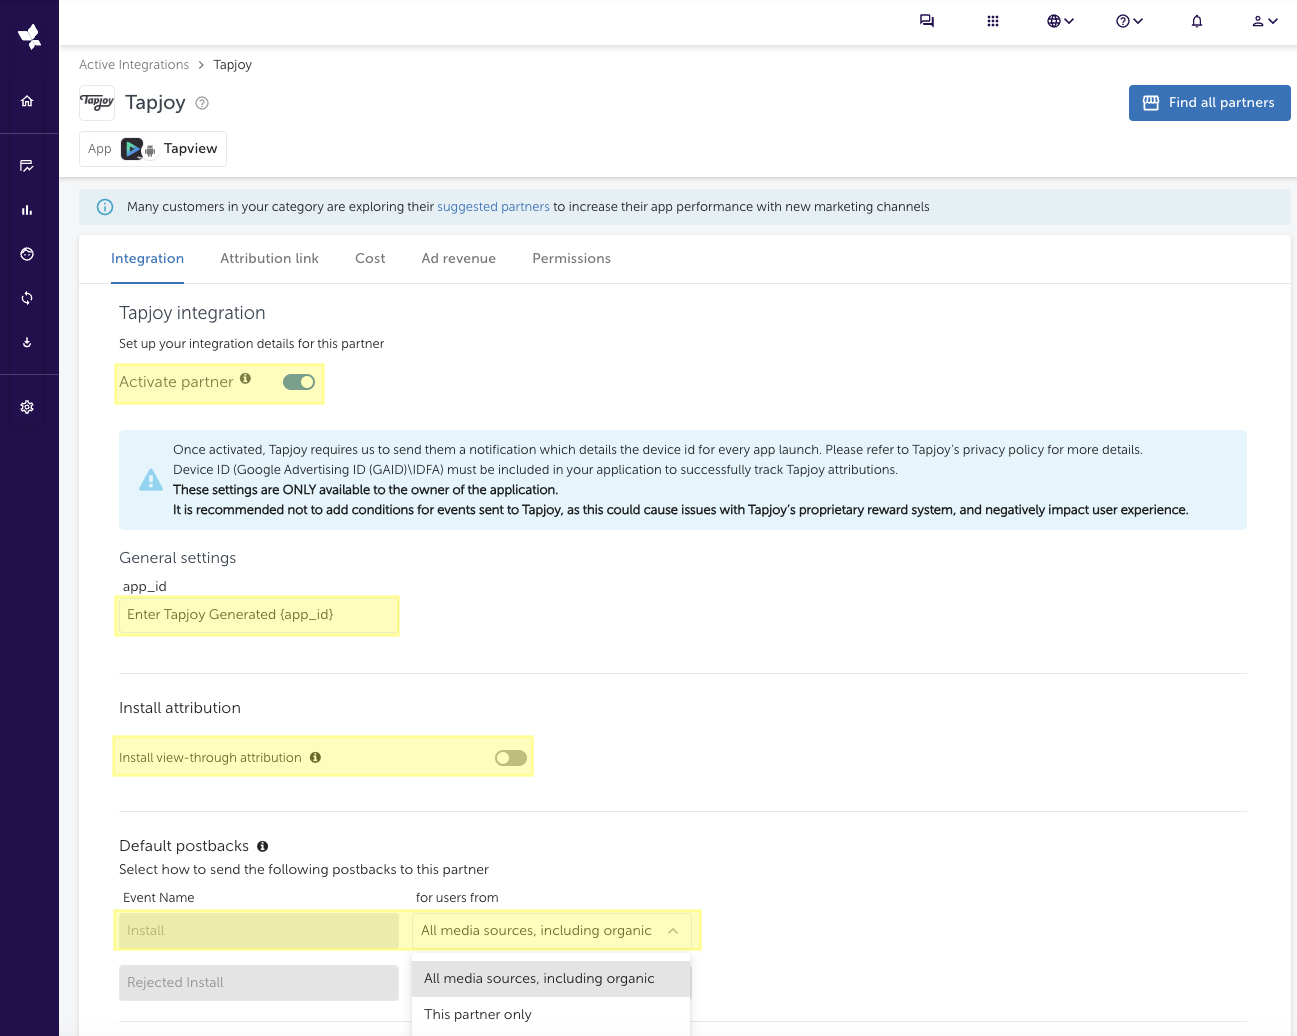
Step 2: Integration Tab (Install)
First Time Installers
- Toggle Activate Partner.
- Input the Tapjoy generated string under the app_id field.
- Toggle OFF the Install view-through attribution option.
- Under the Default Postback section, next to install, select
All media sources, including organic.
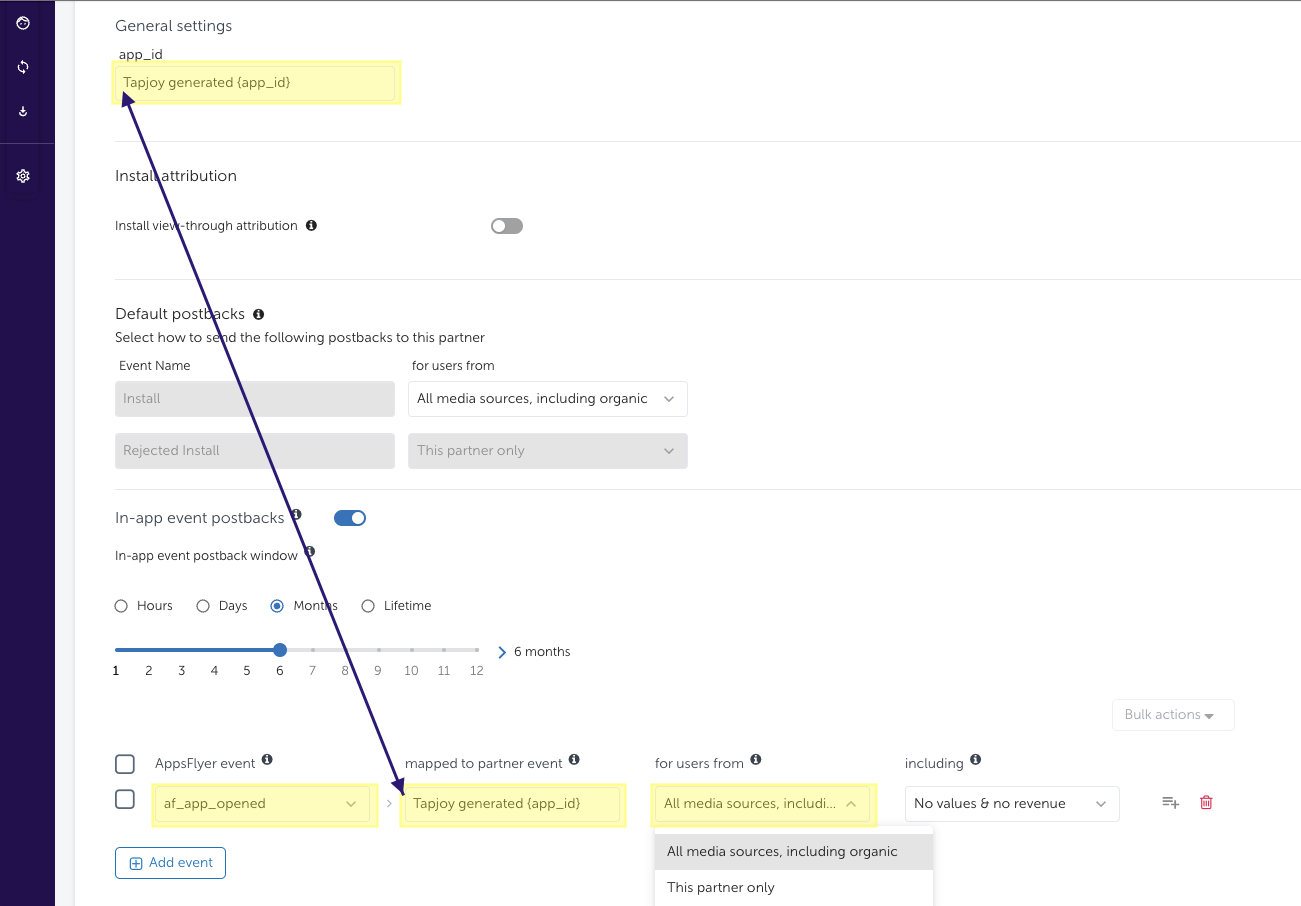
Existing Users
- Toggle In-app events postback.
- Click the + Add Event button.
- Under Appsflyer event, search for or add
af_app_opened. - Use the same Tapjoy-generated string entered in the app_id field from Step #2.2.
- In the
for users fromdropdown, selectAll media sources, including organic. - Click Save Integration or proceed to Step #3 Integration Tab: Events to add more post-install events.
⚠️ IMPORTANT ⚠️
Dynamic Suppression Requirements for Install:
To comply with our Dynamic Suppression Policy and ensure optimal performance, the following configurations are required as of Apr 1, 2022:
- First Time Installers - Users who’ve never installed or launched the app on their device. Reinstalls are not considered new installs.
- Existing Users - Users who previously installed and launched the app on their device at any point, including those who have reinstalled the app after uninstalling it.
Step 3: Integration Tab (Events)
Single + Multi-Reward CPE
- Scroll down to the In-app events postback section.
- Click the + Add Event button.
- Under Appsflyer event, select the event from the dropdown.
- Input the Tapjoy generated engagement_id under mapped to partner event field.
- Repeat steps 2 - 4 until all events are configured and point to a unique engagement_id.
- Click Save Integration, or proceed to the Daily Rewards section to configure additional post-install events.
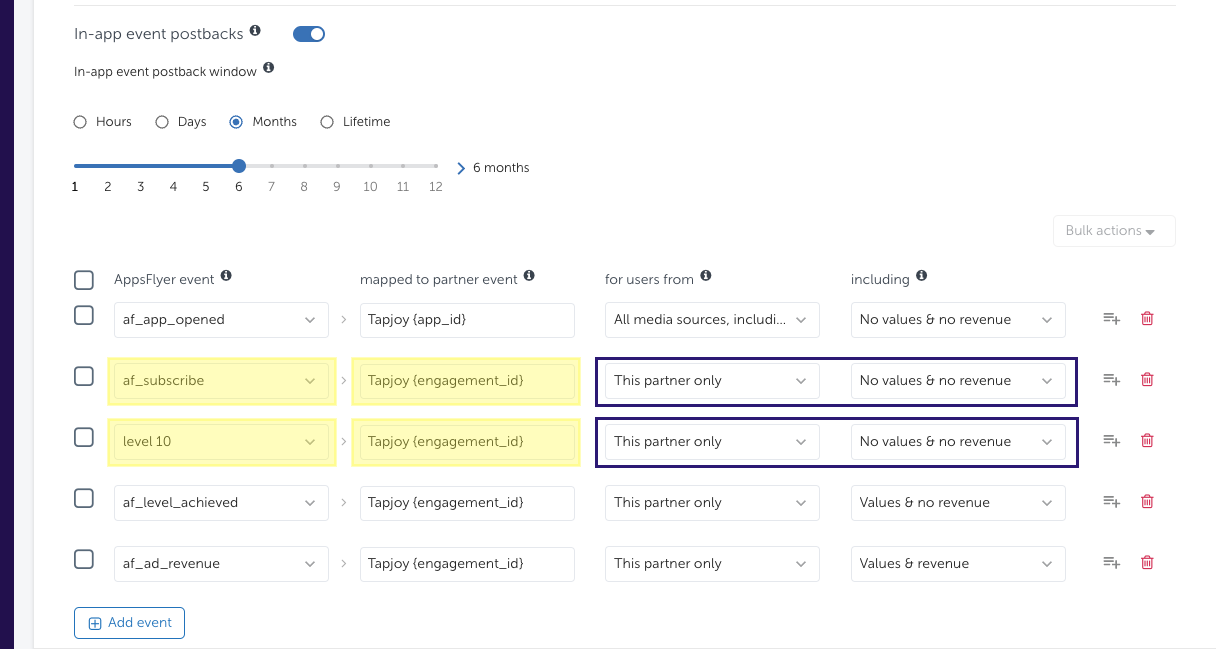
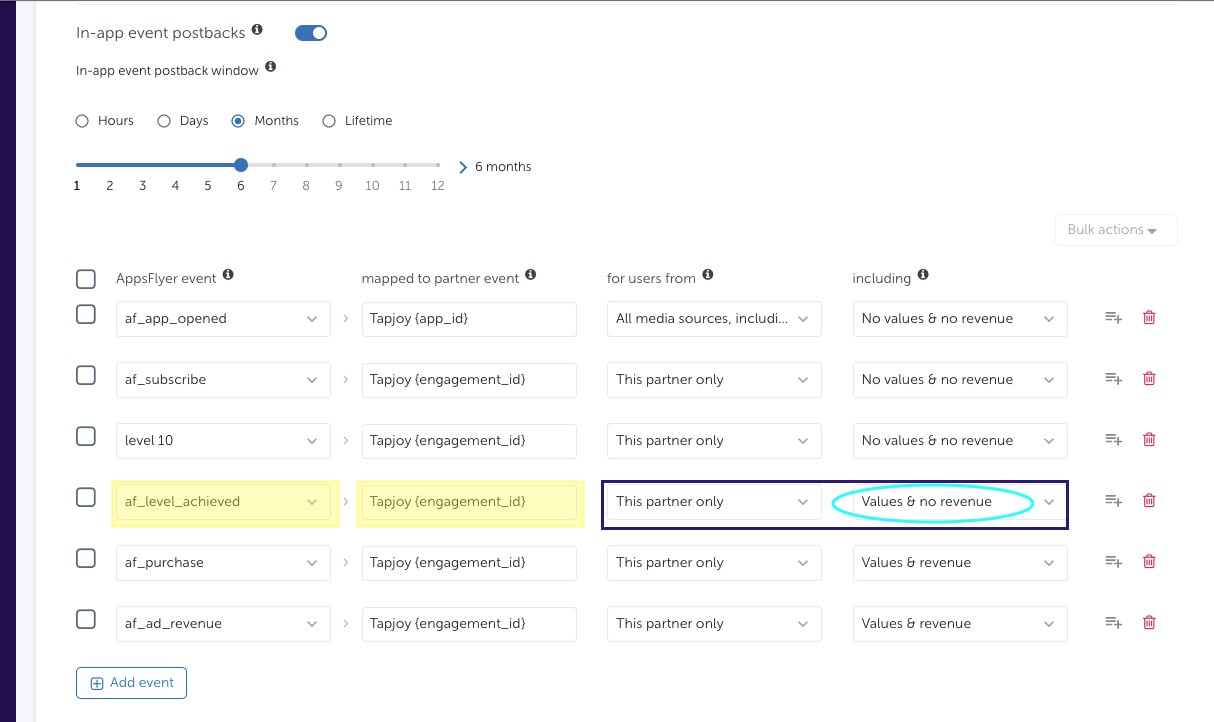
Daily Rewards CPE
- Scroll down to the In-app events postback section.
- Click the + Add Event button.
- Add the SDK event associated with in-game leveling up. Supported event names include both custom events and Appsflyer’s predefined ones, such as
af_leveloraf_level_achieved.
Appsflyer recommends integrating the following predefined events for in-game leveling up: af_level for in-app purchases, af_level_achieved for user generated ad revenue events. Custom events are also supported. Learn how to define an event and use the event generator. For more information, please visit tips and limitations.
- Input the Tapjoy generated engagement_id under mapped to partner event.
- Under Including, select
Values + No Revenuein the dropdown to ensure level data is included in the conversion postback information. - Click Save Integration.
IAP and Ad Revenue Configuration for ROAS
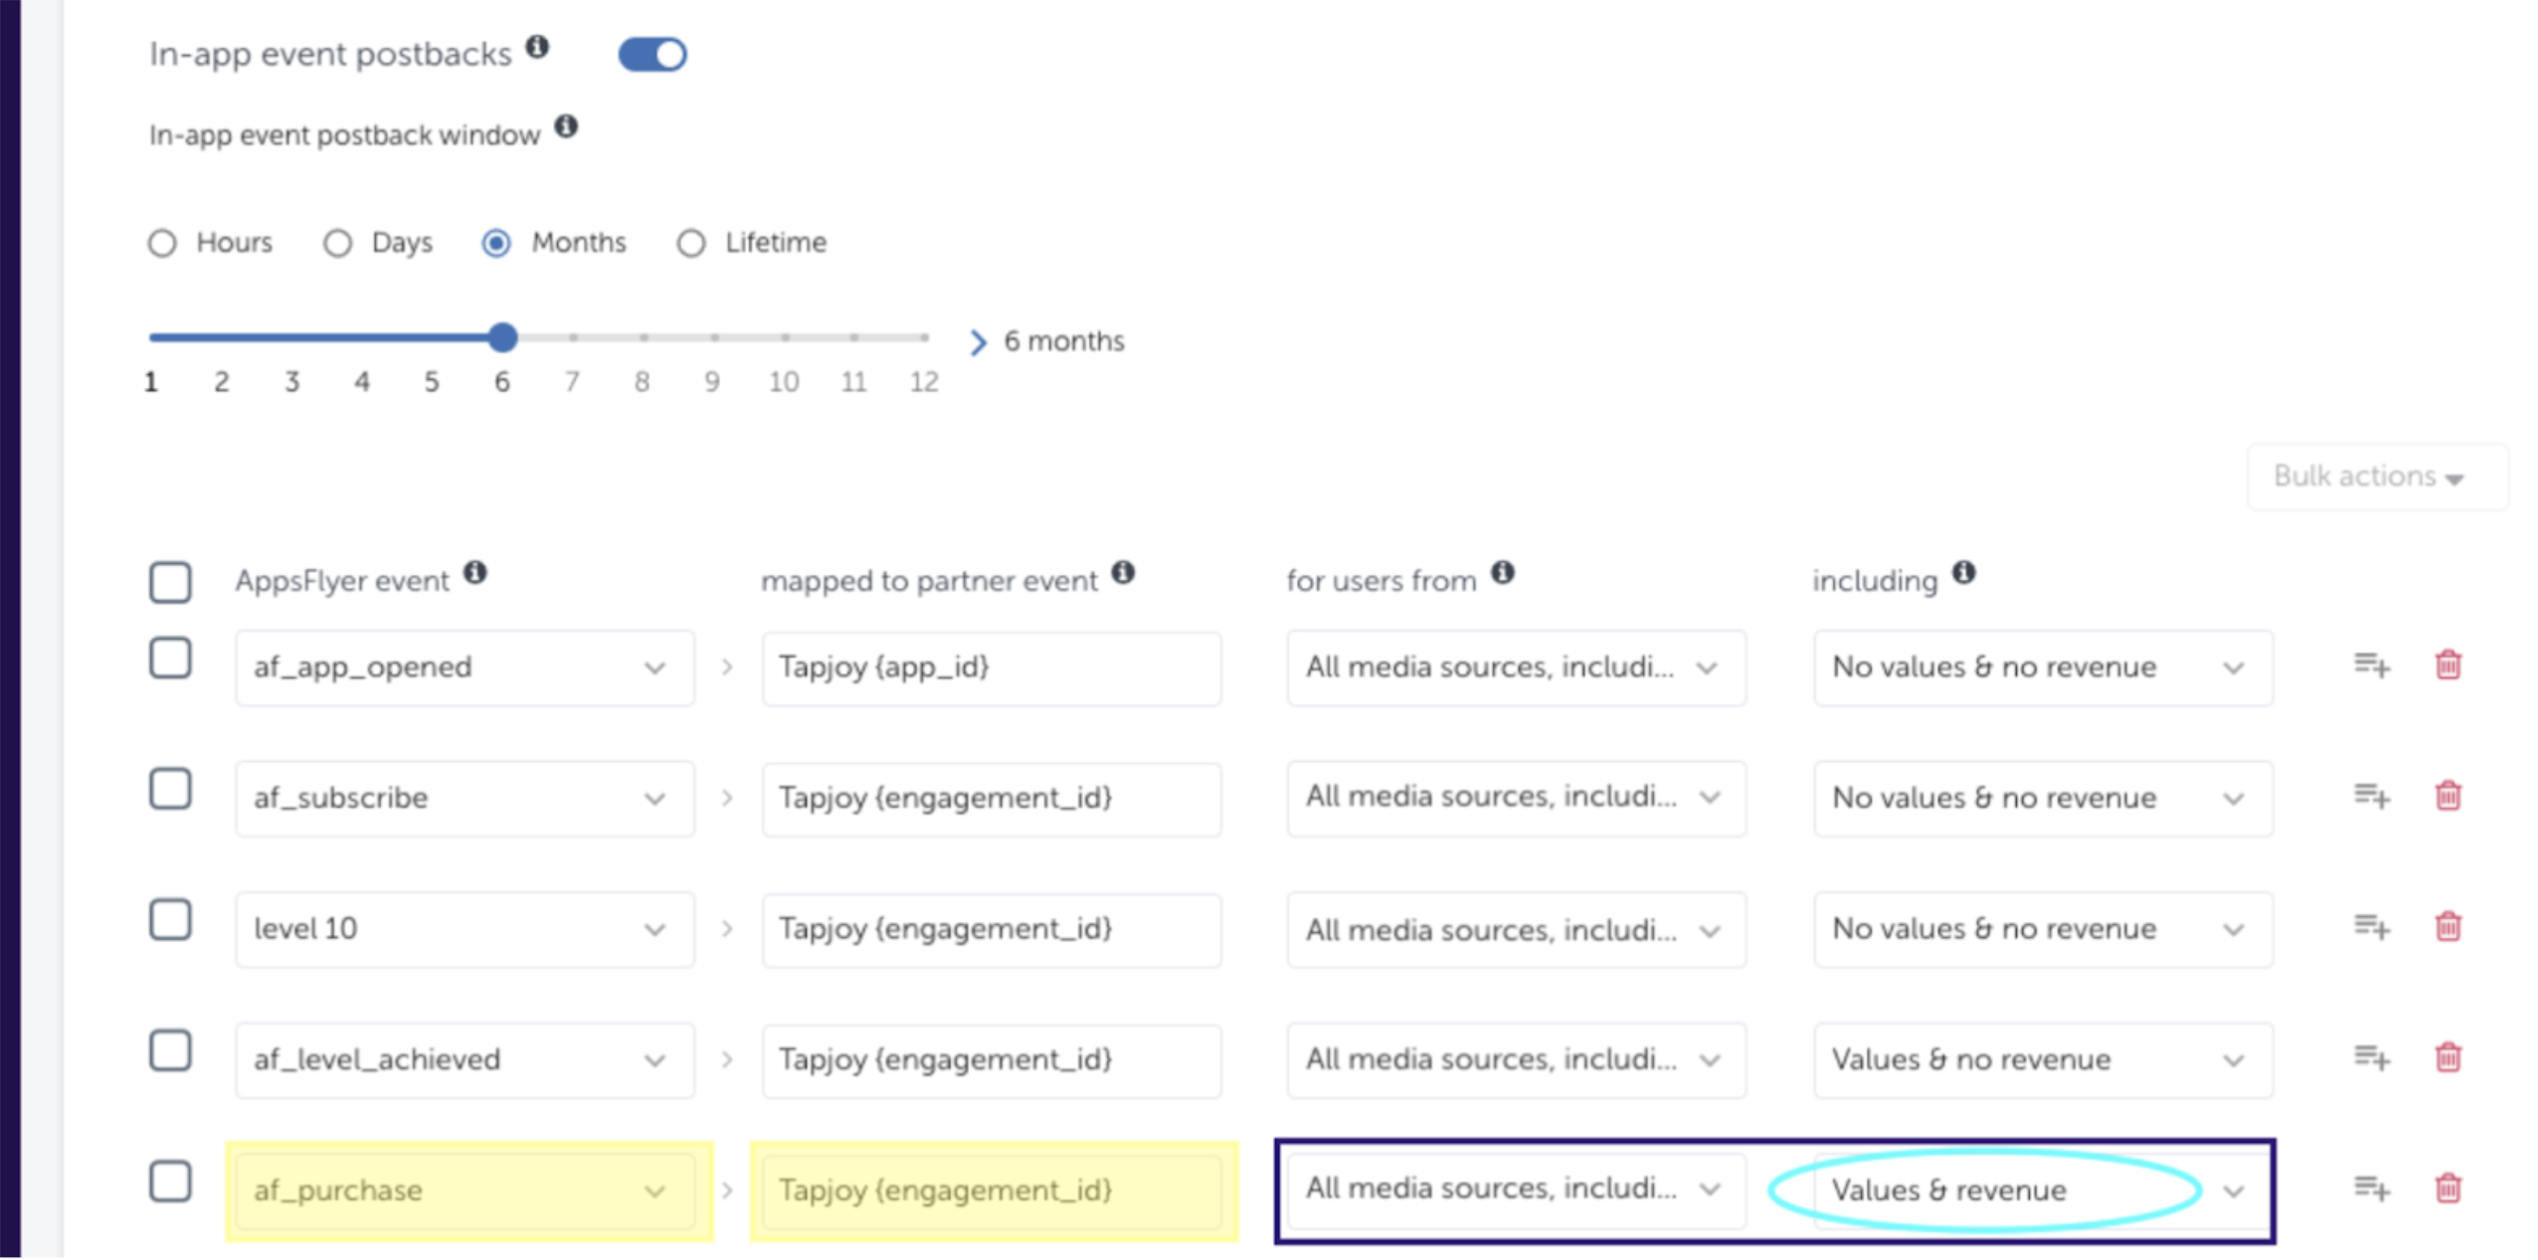
Appsflyer IAP Setup
- Under the In-app events postback section, click the + Add Event button.
- Add your in-app purchase event. We strongly recommend using the event name of
af_purchasefor IAP events (see Appsflyer's af_purchase event). - Input the Tapjoy generated engagement_id under mapped to partner event.
- Choose your preferred sending option under the for users from column. We recommend selecting "All media sources, including organic".
- Under Including, select
Values + Revenueto ensure amounts are included in the conversion postback information. - Click Save Integration.
See Appsflyer's predefined events list.
Appsflyer Ad Revenue Setup
Tapjoy supports two methods for sending ad revenue: Postbacks and the Data Locker. We recommend the Postback method (Method 1 below) for improved data quality.
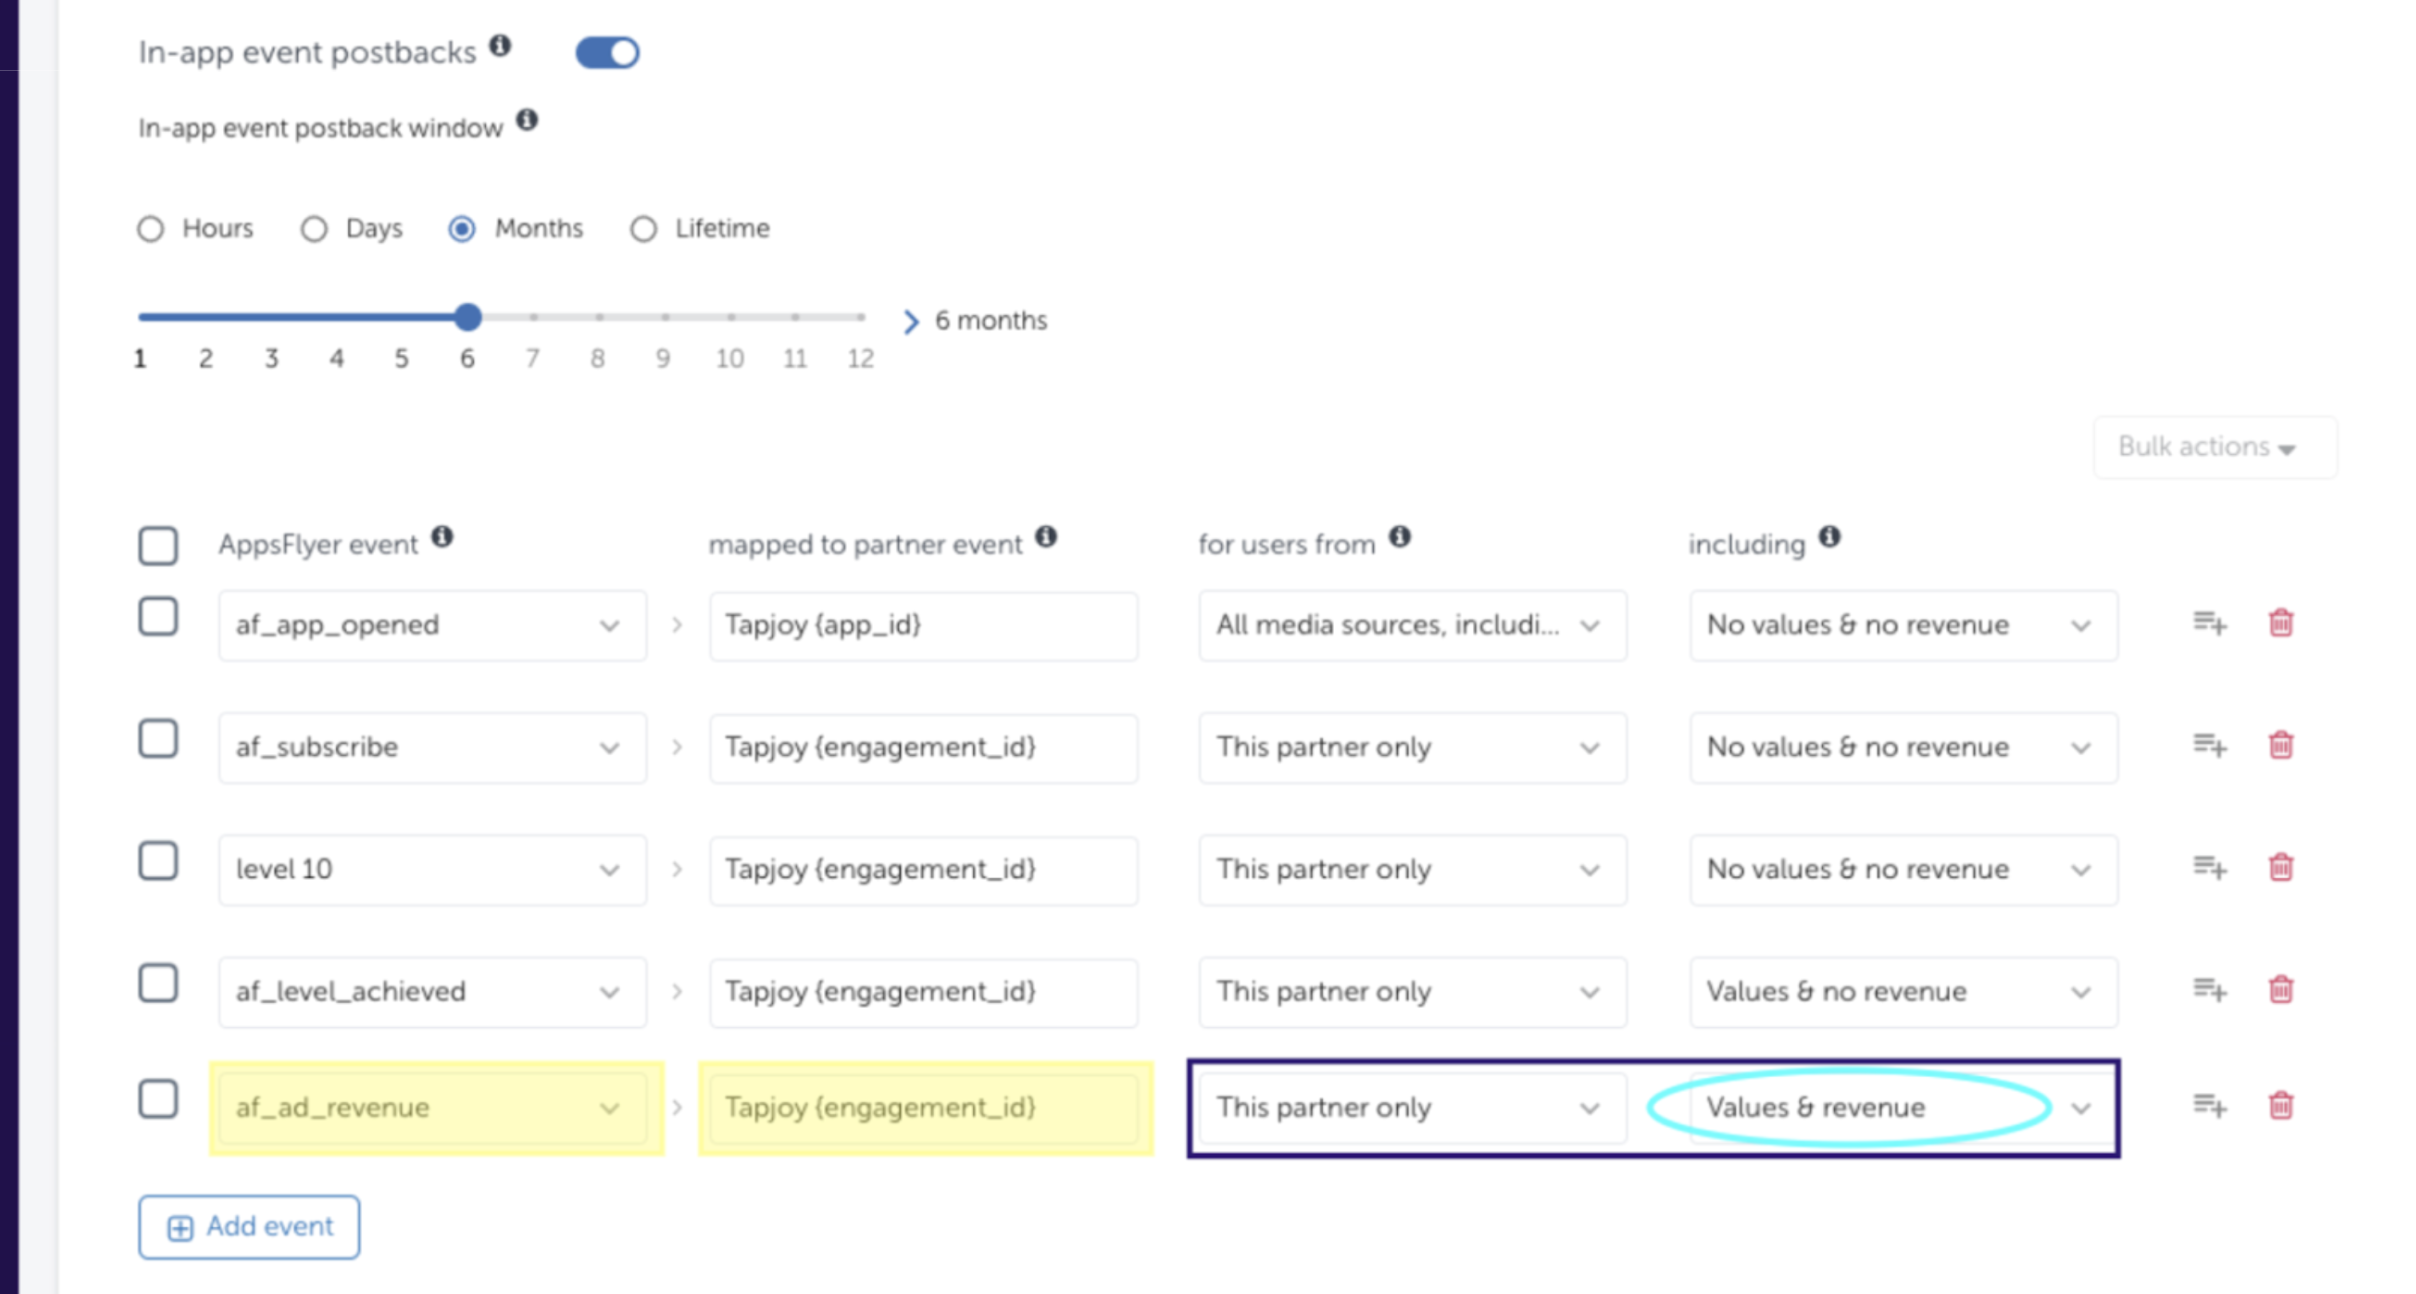
Method 1: Configuring Ad Revenue through Postbacks (Preferred method)
- Under the In-app events postback section, click the + Add Event button.
- Add your ad revenue event using the event name of
af_ad_revenue. Using the af_ad_revenue event name is required. - Input the Tapjoy generated engagement_id under mapped to partner event.
- Choose your preferred sending option under the for users from column. We recommend selecting "All media sources, including organic".
- Under Including, select
Values + Revenueto ensure amounts are included in the conversion postback information. - Click Save Integration.
⚠️ IMPORTANT
- If you are enabling ad revenue through postbacks for an app for the first time, please notify your Account Manager to have this data enabled and displayed in the Tapjoy Dashboard.
- Otherwise, ad revenue in the Tapjoy Dashboard will either not be reflected or will continue to come from your Data Locker data, if the Data Locker has been configured for this app.
This must be done for each app individually.
Method 2: Enabling Ad Revenue through the Data Locker
Advertisers must have an ROI360 advanced subscription in order to use this method.
- From the side menu, select Collaborate > Active Integrations.
- Use the search bar to find and select Tapjoy.
- Navigate to the Permissions tab.
- Turn on Ad Network Permissions.
- Turn on the permission Access ad revenue raw data (UA signals).
- Click Save.
See Ad revenue signals for UA ad networks for more information.
